Getting started
Setup
Dagflow can be run easily using the docker. The only requirement is to have docker and docker-compose installed on the system. You can find the docker-compose file in the repostiory. If you already have an airflow environment you don’t have to start the airflow container from here. Airflow and python versions are mentioned in the .env file, if needed you can change it and build the image.
Providers
The “Core” of Apache Airflow provides core scheduler functionality which allows you to write some basic tasks, but the capabilities of Apache Airflow can be extended by installing additional packages, called providers. Installing additional providers can be done in two ways:
Adding the providers in the requirements.txt file and rebuilding the image.
Adding the provider names inside docker-airflow and ./app/Dockerfile in the airflow installation command apache-airflow[postgres,google]. (Adding the providers here will be limited and we recommend to add the providers in the requirements.txt file)
Execute the below commands to start dagflow application
git clone git@github.com:jegaths/dagflow.git
cd dagflow
# If you want to run dagflow and airflow
docker compose -f docker-compose.yml -f docker-compose-airflow.yml up -d
#If you only want to run dagflow
docker compose up -d
Project
Once the application is up and running, you can access the dagflow application using url http://localhost
You will be greeted with the homepage directly where you have the option to create a new dagflow or import an existing dag to dagflow. You can also see the list of the recent dagflows.

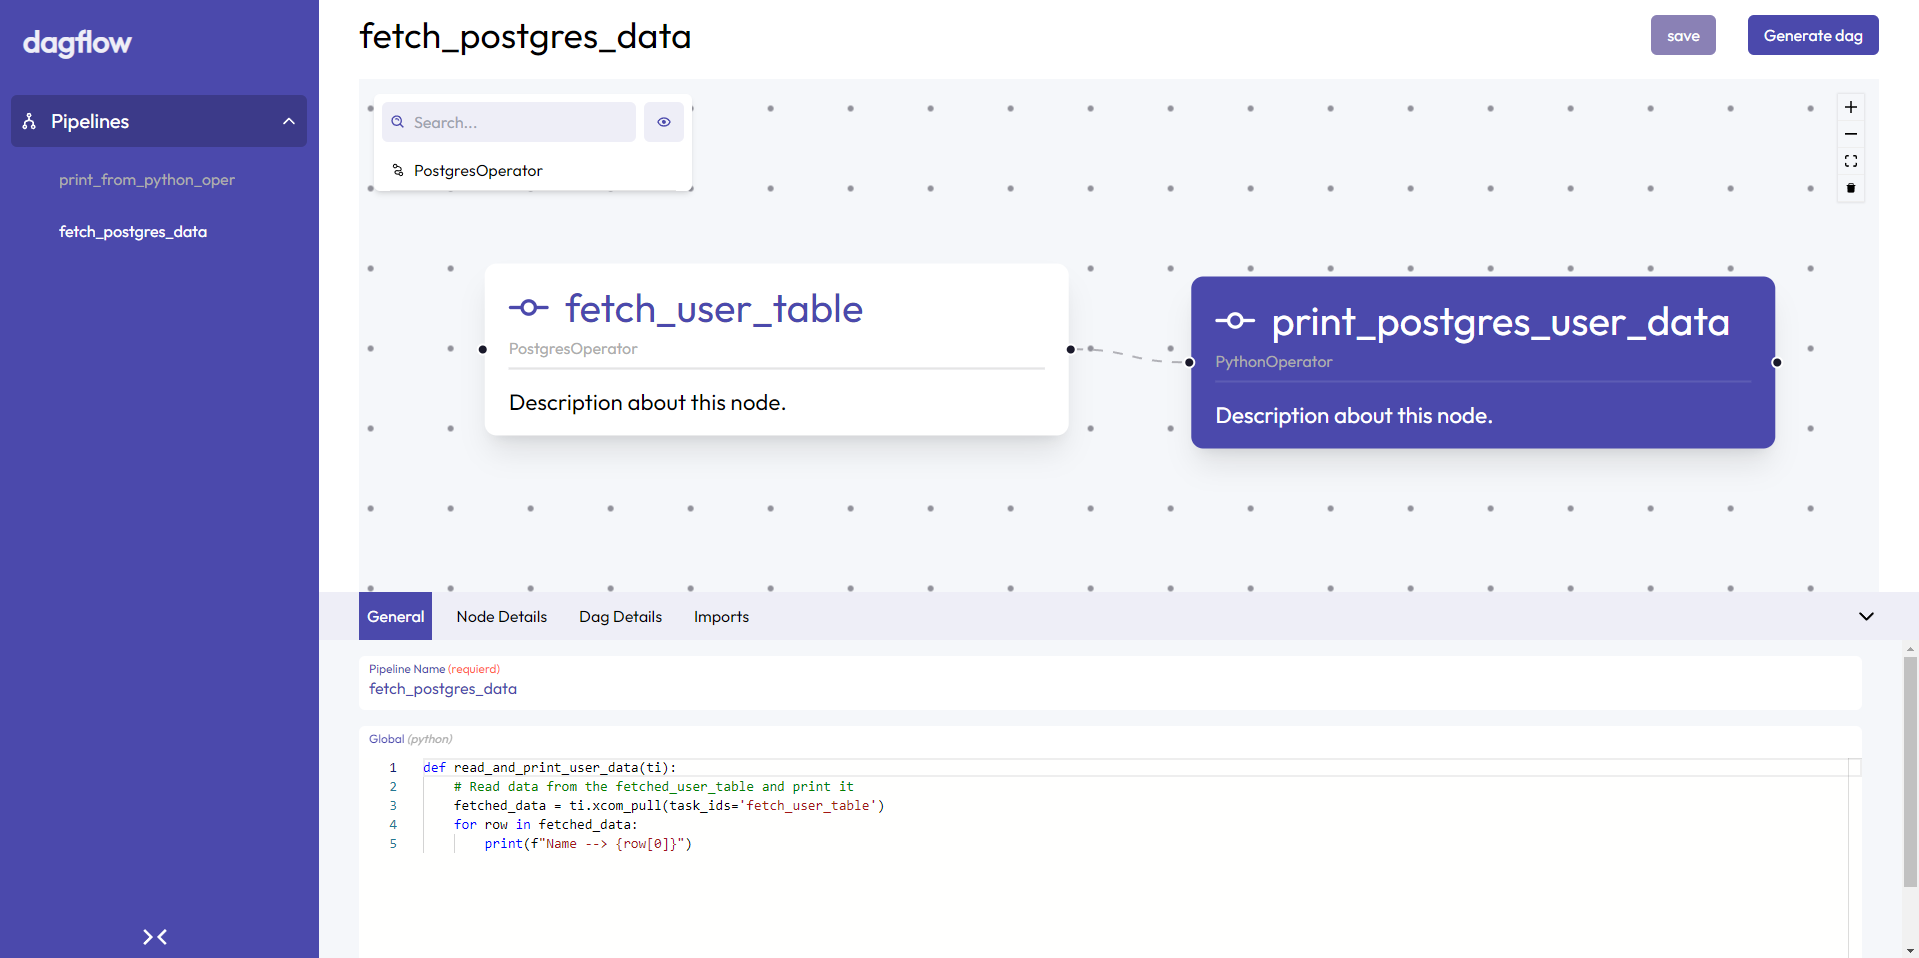
Once you opt for creating a new dagflow or importing an existing dagflow you will be taken to the editor page where you can drag and drop different operators fill the details, save the dagflow, generate the dag etc.
If you are importing a dag file for the first time, it will generate all the operators which is mentioned in the dag file and place it in the canvas. You can then edit the dagflow as per your requirement.
Note
For the first time the positions of the operators will be random. You can rearrange the operators as per your requirement and save the dagflow. The positions of the operators will be saved and the next time you open the dagflow the operators will be placed in the same position. Also, before importing the dagfile make sure that all the operators in the dagfile is installed in the dagflow environment as well.
Operator Lists
Once you are in the editor page, you can see a canvas with a list of operators. You can drag and drop the operators to the canvas and start building your dagflow.
Dagflow details
As you can see there are multiple tabs at the bottom of the page which contains different information about the dagflow. The tabs are explained below. 1. General - Contains the pipeline name (dag file name) and a global field which contains the global variables,functions, codes which can be used across the dagflow or dag.

Node Details - Contains all the arguments for that particular node(operator). The arguments are different for different operators and some arguments are mandatory and some are optional. All the mandatory arguments are marked as required and a validation is done while saving the dagflow.

Dag Details - Contains the dag details like dag name, schedule interval, start date, end date, catchup etc.

Imports - Contains the list of imports which are required for the dagflow. The imports are automatically generated based on the operators used in the dagflow. You can also add additional imports if required.

Saving a dagflow
Once you are done with the dagflow you can save the dagflow by clicking the save button at the top right corner of the page. Once the dagflow is saved you can see the dagflow in the homepage recents and sidebar. We are using mongodb to save the dagflow projects.
Generating a dag
When you are ready, you can generate the dag by clicking the generate button at the top right corner of the page. The generated dag will be placed on to the dags folder inside the directory mentioned in the env file (AIRFLOW_PROJ_DIR). The dag will be generated with the name of the dagflow project name.
Deleting a dagflow
You can delete a dagflow by clicking the delete button at the top right corner of the canvas. This will delete the dagflow from the database but the generated dag will still be present in the dags folder. You can delete the dag manually if required.